Inventory
Print inventory and barcode labels
Search stock items, select label quantities and print product or barcode labels.
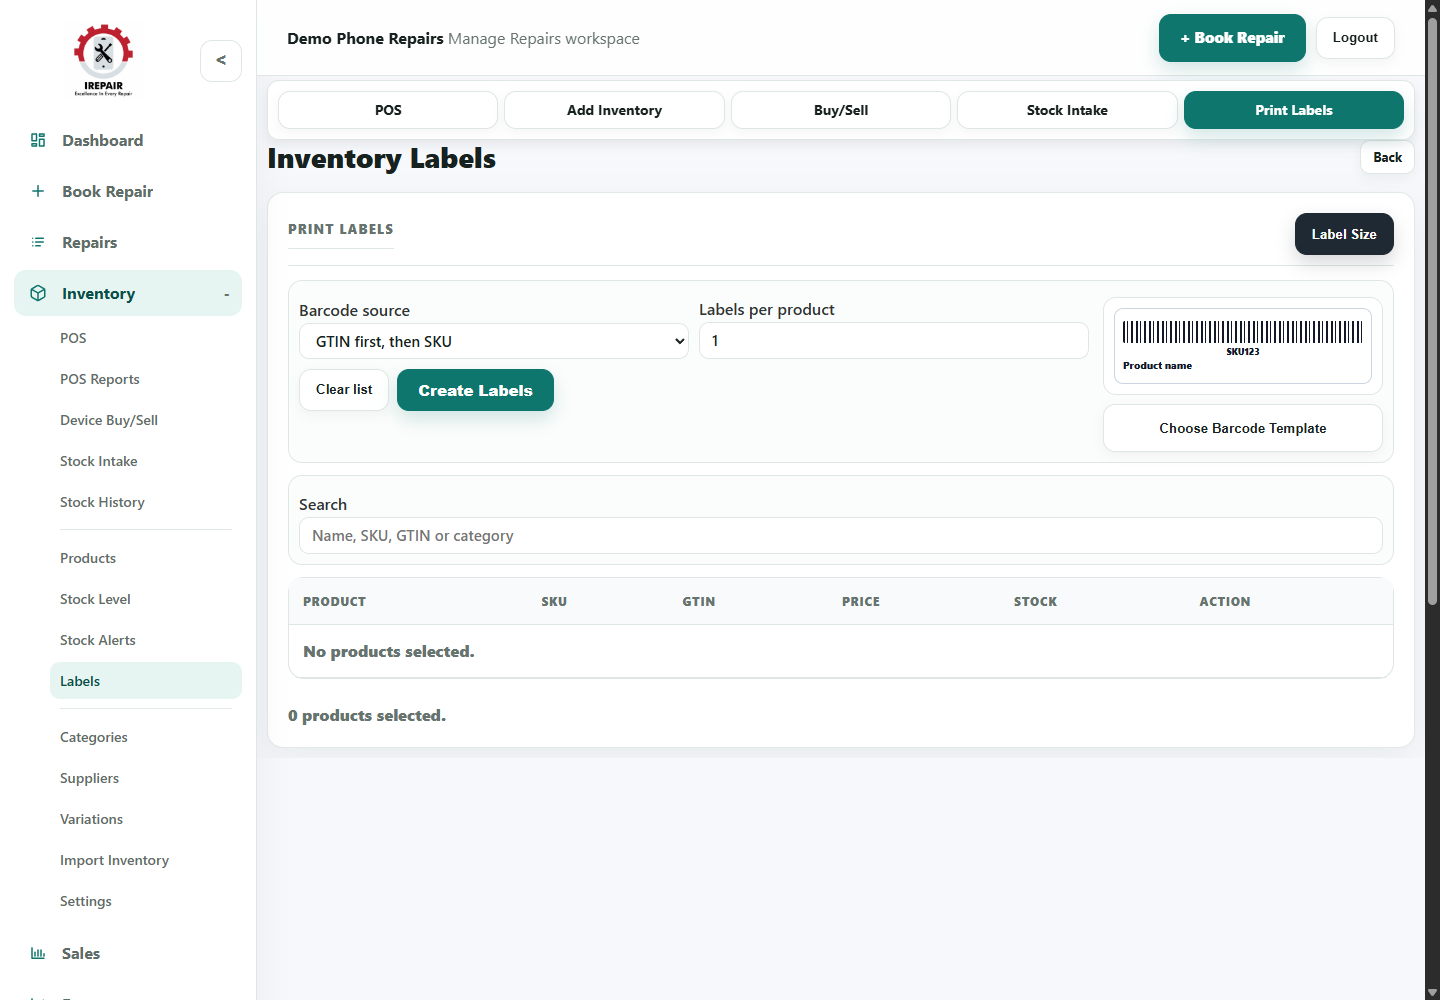
Before you start
Inventory labels help staff identify products, scan barcodes and keep shelves organised.
Important sections on this page
Use these focused screenshots when matching the guide to the real screen.
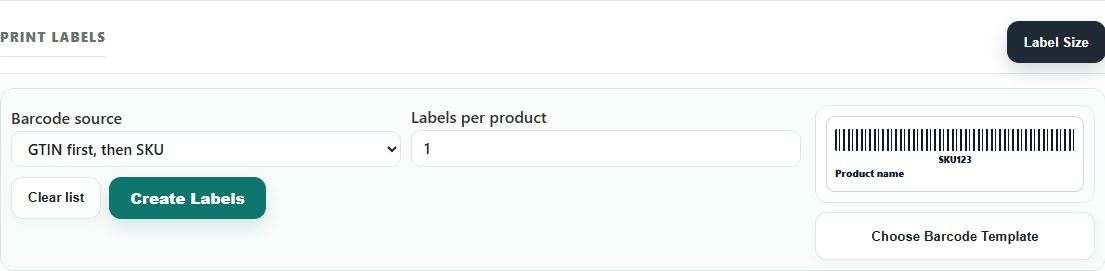
Label setup and preview
Set the barcode source and labels per product before printing.
- Choose whether labels use GTIN first or SKU.
- Set the number of labels needed for each selected product.
- Check the preview before printing a batch.

Search and selected products
Use search to add the right items to the label batch.
- Search by product name, SKU, GTIN or category.
- Review the product table before creating labels.
- Clear the list when starting a new label batch.
Step-by-step
- Open Inventory and choose Labels.
- Search for products by name, SKU, barcode or category.
- Choose the products that need labels.
- Set the quantity of labels for each product.
- Review label size and print settings.
- Print labels and attach them to products, shelves or packaging.
Good to know
Print labels after receiving new stock so items are ready for POS scanning.
Keep label dimensions consistent with your printer and label roll.