Repairs
Create and print repair labels
Print labels for repair tickets so devices, bags and shelves stay connected to the right customer.
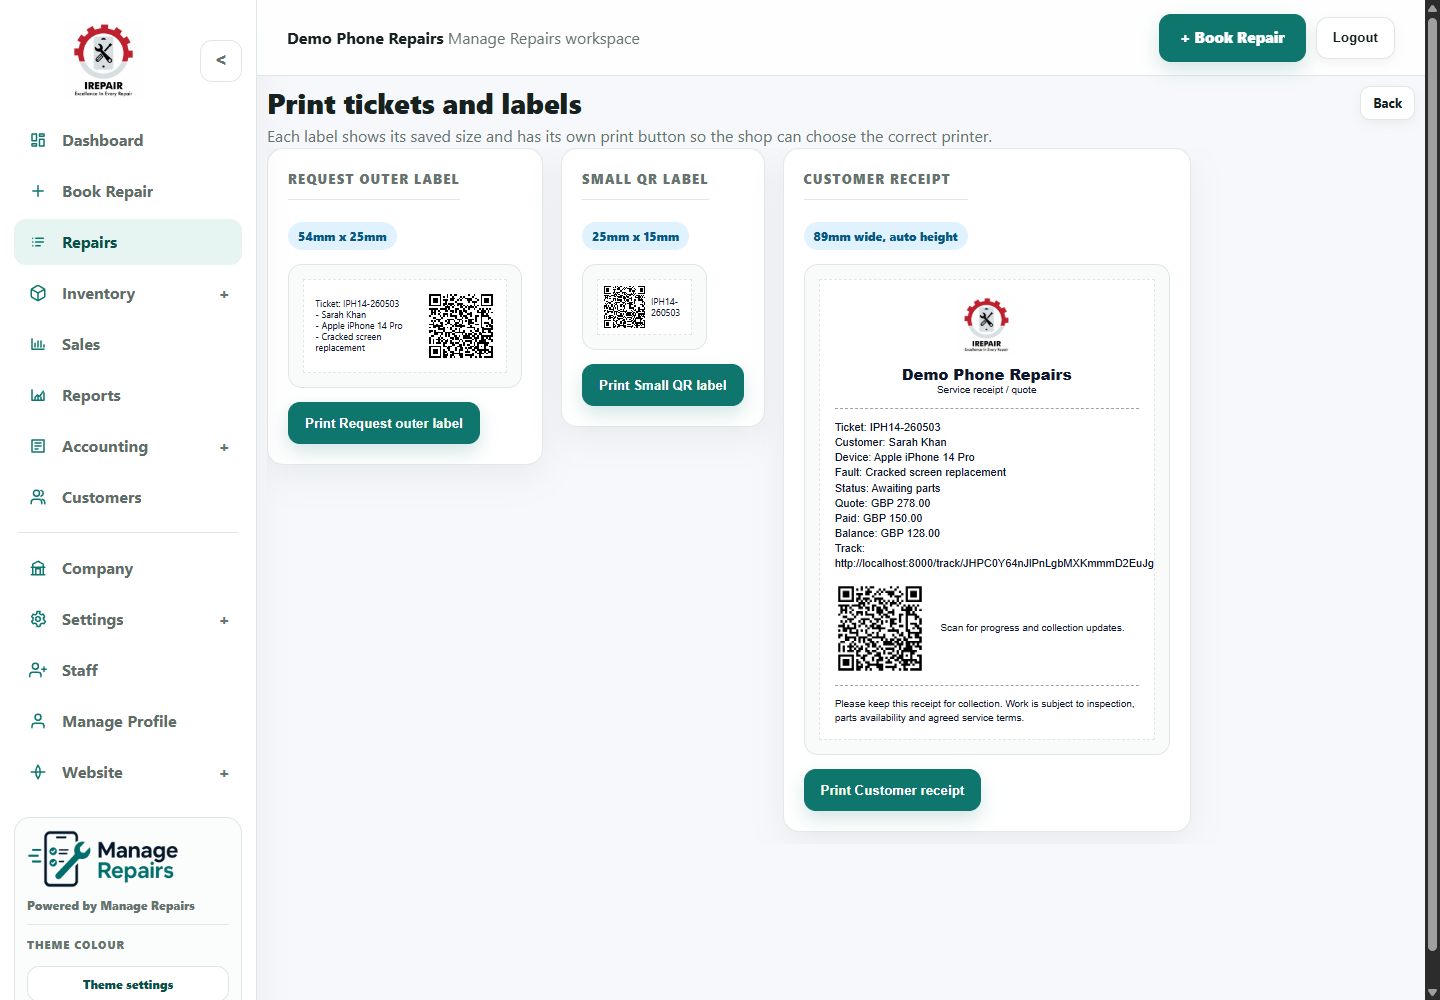
Before you start
Repair labels help staff connect a physical device to the right ticket. This is especially useful when several similar phones or laptops are waiting on parts.
Step-by-step
- Open the repair ticket from the repairs list.
- Choose the Labels option for that repair.
- Review the label preview and confirm the ticket, customer and device details look correct.
- Print the label using the shop label printer or browser print option.
- Attach the label to the repair bag, device tray or shelf location used by your shop.
Good to know
Check label size in Labels Settings before printing a batch.
Use the same label position every time so staff can scan or read labels quickly.